Introduction
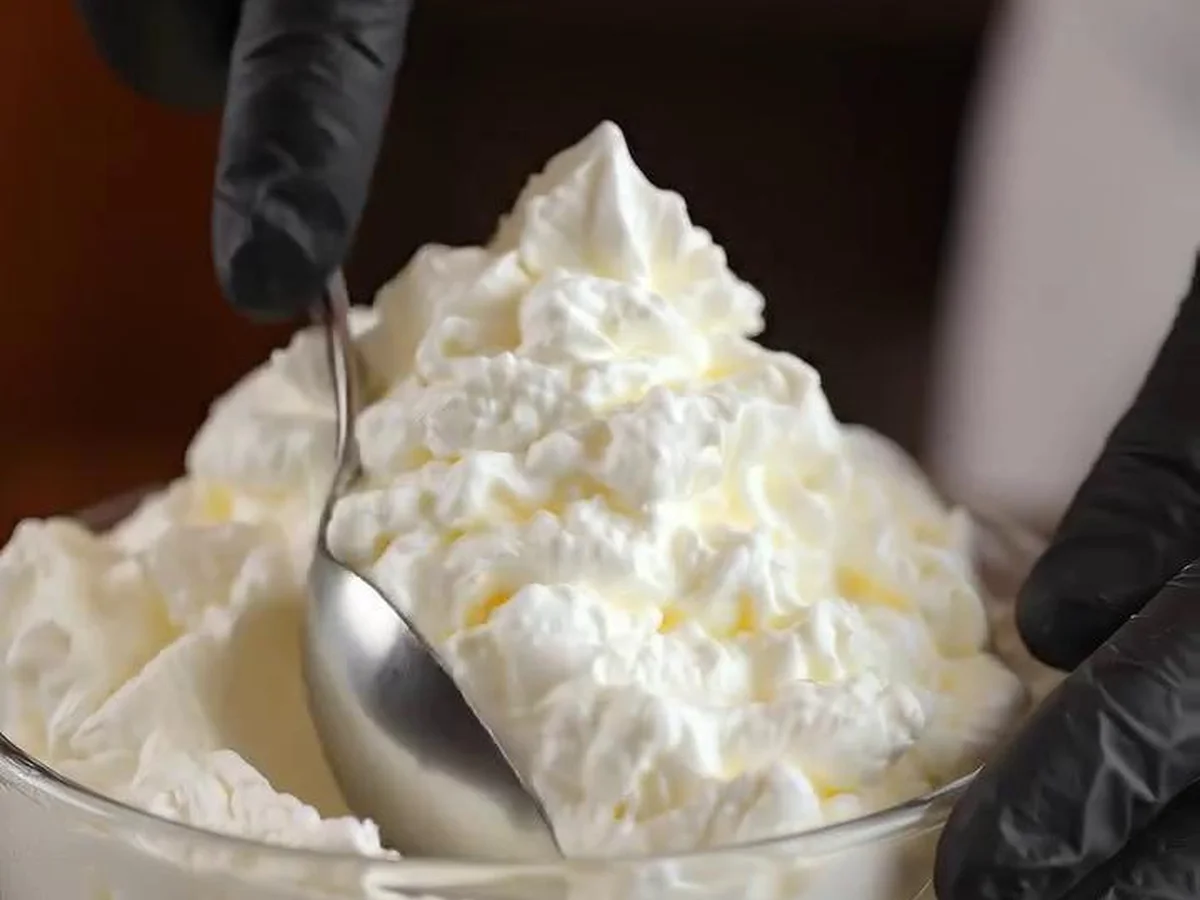
There’s truly nothing as indulgently delightful as a dollop of homemade whipped cream. The mere mention evokes a sense of nostalgia and warmth, conjuring memories of family gatherings, festive celebrations, or quiet evenings in with a slice of pie. As you spoon this creamy topping onto desserts, the airy texture almost seems to float in midair, while its rich, sweet aroma wafts through the air, inviting you in for just one more taste. The first bite delivers a silky-smooth sensation that dances on your palate, balancing the sweet with the cool, and enhancing whatever it graces—be it fresh berries, a slice of velvety cheesecake, or that hot drink you’ve been craving. Indeed, whipped cream is more than just a simple topping—it’s a sensory experience that brings even the most straightforward dessert to life, and there’s a certain comfort found in its homemade version that store-bought simply can’t replicate.
The Origins and History
Whipped cream, as we know it today, has a storied history that dates back centuries. Its rich origins can be traced to the cream-rich landscapes of Europe, particularly in French and Italian cuisines, where it was first incorporated into desserts. The phrase “cream whipped by hand” first appeared in a French cookbook in the early 16th century, a testament to the labor-intensive process that chefs undertook to create this luscious concoction. Over the years, whipped cream has evolved and adapted, becoming a staple across continents due to its versatility. From the decadent pastry shops of Paris to the cozy bakeries of Italy, whipped cream has weaved its way into the culinary fabric of various cultures, transforming the simplest sweet treats into extraordinary delights. Today, its ease of production and delightful flavor have made it a universal favorite, adored by dessert lovers young and old.
Why You Will Absolutely Love This Recipe
- Flavor Profile: Homemade whipped cream boasts a fresh, vibrant taste that can be adjusted to your palate’s preference—sweet, vanilla-infused, or even chocolatey with a simple addition.
- Ease of Preparation: With just a few simple ingredients and minimal tools, whipping cream becomes a task accessible to even the most novice of home cooks.
- Crowd-Pleaser: Whether it’s a birthday cake, family brunch, or holiday gathering, homemade whipped cream elevates any dish, ensuring every guest leaves with a smile.
- Leftovers: While it’s always tempting to use it all at once, any leftover whipped cream can be easily stored, making it the perfect topping for future treats or coffees.
Deep Dive into the Ingredients
A successful whipped cream hinges on the quality and characteristics of its ingredients. Let’s explore each one in detail:
- Cold Whole Milk: Whole milk is essential for achieving the perfect texture and consistency of whipped cream. Its higher fat content compared to skim and low-fat milk provides the luscious mouthfeel and stability necessary for a successful whip. While some recipes call for heavy cream, this version proves that using whole milk can still yield a deliciously airy topping.
- Powdered Sugar: This type of sugar is an absolute must for achieving the right sweetness without grittiness. Powdered sugar, finely ground and often mixed with cornstarch, dissolves quickly, ensuring your whipped cream remains smooth and creamy. You can always adjust the quantity to suit your taste. If you want to experiment with flavors, you can infuse powdered sugar with cocoa or spices.
- Vanilla Extract: While optional, a splash of vanilla extract adds a warm, aromatic sweetness that complements the cream perfectly. Sourced from real vanilla beans, the extract elevates the flavor profile, making your whipped cream even more irresistible.
- Unflavored Gelatin: For those who crave stability in their whipped cream, unflavored gelatin is a game-changer. It prevents the cream from deflating too quickly, making it ideal for decorating cakes or desserts that may sit out for some time. When dissolved in cold water and carefully folded into the cream, it transforms your whipped cream into a thick, cloud-like topping.
- Cold Water: If using gelatin, cold water is imperative to help activate the gelatin. It ensures that the gelatin mixes evenly without affecting the overall temperature of your whipped cream.
For substitutions, it’s possible to use alternative milks, such as almond or coconut, for a dairy-free version, but the texture may differ slightly. Be mindful that some substitutes may lack the necessary fat to stabilize. Find other sweeteners such as honey or agave syrup for a different flavor experience, just remember that you will need to account for varying sweetness levels.
Pro Tips for Perfect Results
Achieving the ideal whipped cream requires precision and technique. Here are my top tips to guide you:
- Chill Everything: For the best results, ensure your mixing bowl, beaters, and even the milk are thoroughly chilled before starting. This step greatly aids in achieving volume and stability in your whipped cream.
- Keep an Eye on Consistency: Whipped cream progresses through stages—soft peaks, medium peaks, and finally stiff peaks. Monitor throughout the process to avoid over-beating, which can lead to graininess and even the dreaded butter!
- Gradual Sweetening: Begin by adding your powdered sugar gradually. This method allows you to tailor the sweetness to your liking without overwhelming the cream.
- Folding in Gelatin: If using gelatin, allow it to bloom for the best results. Dissolve it in cold water gently and then quickly incorporate it into the cream for maximum stability.
Serving and Pairing Suggestions
Homemade whipped cream is a versatile companion to a plethora of desserts. Whether you decide to serve it with a fresh bowl of strawberries, a decadent chocolate cake, or nestled atop a hot drink, it captivates the senses. Consider pairing it with classic desserts like pie, cobblers, or even a simple bowl of vanilla ice cream for an elevated treat. For beverages, a dollop of whipped cream swirled into coffee or hot chocolate brings warmth and richness, making it perfect for gatherings or relaxing evenings.
Storage, Freezing, and Reheating
Correctly storing whipped cream helps maintain its fresh, airy texture. If you anticipate leftovers, transfer the cream to an airtight container and keep it refrigerated. Properly stored, it can last for about 2-3 days. For extended storage, you can freeze whipped cream by spooning it into dollops on a parchment-lined baking sheet and freezing until solid. Once frozen, transfer the dollops to a zip-top freezer bag. When you’re ready to use it, simply thaw it in the refrigerator or at room temperature, and gently re-whip if necessary!
Frequently Asked Questions (FAQ)
Can I use heavy cream instead of whole milk? Yes! Heavy cream yields a richer and thicker whipped cream. However, whole milk provides delicious results with less fat.
How can I make flavored whipped cream? Simply integrate extracts or flavored syrups during the whipping process, such as peppermint or almond for unique twists. You are encouraged to experiment!
Why is my whipped cream watery? This can happen if it hasn’t been whipped enough to incorporate enough air or if the cream was allowed to sit too long. Always whip until it forms soft or stiff peaks and serve promptly.
How do I stabilize whipped cream for cake decorating? If using gelatin or cornstarch, incorporate it into the cream as directed. This helps maintain its structure, especially on layered cakes.
Can I whip cream with a hand whisk? Absolutely! While an electric mixer is convenient, a hand whisk can also do the job well, though it will take quite a bit of time and effort.
Conclusion
Making homemade whipped cream can be one of the simplest yet most rewarding culinary experiences. With just a few fresh ingredients, you can transform everyday desserts into extraordinary treats. Embrace the process, enjoy the delightful flavors, and let your creativity shine!
The History of This Recipe
Homemade whipped cream has its roots in the culinary practices of 16th century Europe, where cream was lavishly used in desserts. The art of whipping cream into a light, fluffy topping was discovered accidentally as cooks experimented with different techniques to enhance the sweetness and texture of creamy desserts.
As kitchens saw the advent of more sophisticated equipment, such as mixers and whisks, the process became simpler and more accessible. This enabled home cooks to create rich, airy whipped cream to elevate their cakes and pastries, transforming desserts into delightful masterpieces.
In the 20th century, whipped cream became a staple in American households, often served alongside pies, cakes, and coffee. Today, its easy preparation remains a beloved tradition, making every dessert a bit more special with a touch of homemade charm.
Homemade Whipped Cream
INGREDIENTS
- 1 cup of cold whole milk (preferably whole milk for better texture)
- 2 tablespoons of cold water (only if using gelatin)
- 1/4 cup of powdered sugar (adjust to taste)
- 1 teaspoon of vanilla extract (optional, for added flavor)
- 1 teaspoon of unflavored gelatin (optional, for stabilized whipped cream)
INSTRUCTIONS
Chill your mixing bowl and beaters in the freezer for about 15 minutes to ensure everything is cold, which helps in whipping the cream efficiently.
If using gelatin for stabilization, dissolve the unflavored gelatin in the cold water in a small bowl. Let it sit for a few minutes until it absorbs the water and softens.
In the chilled mixing bowl, pour in the cold whole milk. If you’re using gelatin, heat the dissolved gelatin mixture gently until it’s liquid, but not boiling, then add it to the milk.
Using an electric mixer, beat the milk on medium-high speed until soft peaks start to form. This may take a few minutes.
Gradually add the powdered sugar, adjusting the amount to your desired sweetness, and continue to beat until the mixture thickens and stiff peaks form.
If desired, add the vanilla extract for flavor and mix briefly to incorporate.
Serve the whipped cream immediately or store it in the refrigerator for up to 2 hours. If you’ve used gelatin, it will hold its shape longer.
Time & Calories
Preparation Time: 10 minutes
Total Time: 10 minutes (plus chilling time)
Estimated Calories: Approximately 50-70 calories per tablespoon (varies with sugar amount)
NOTES
Enjoy your delicious homemade Homemade Whipped Cream!