Introduction
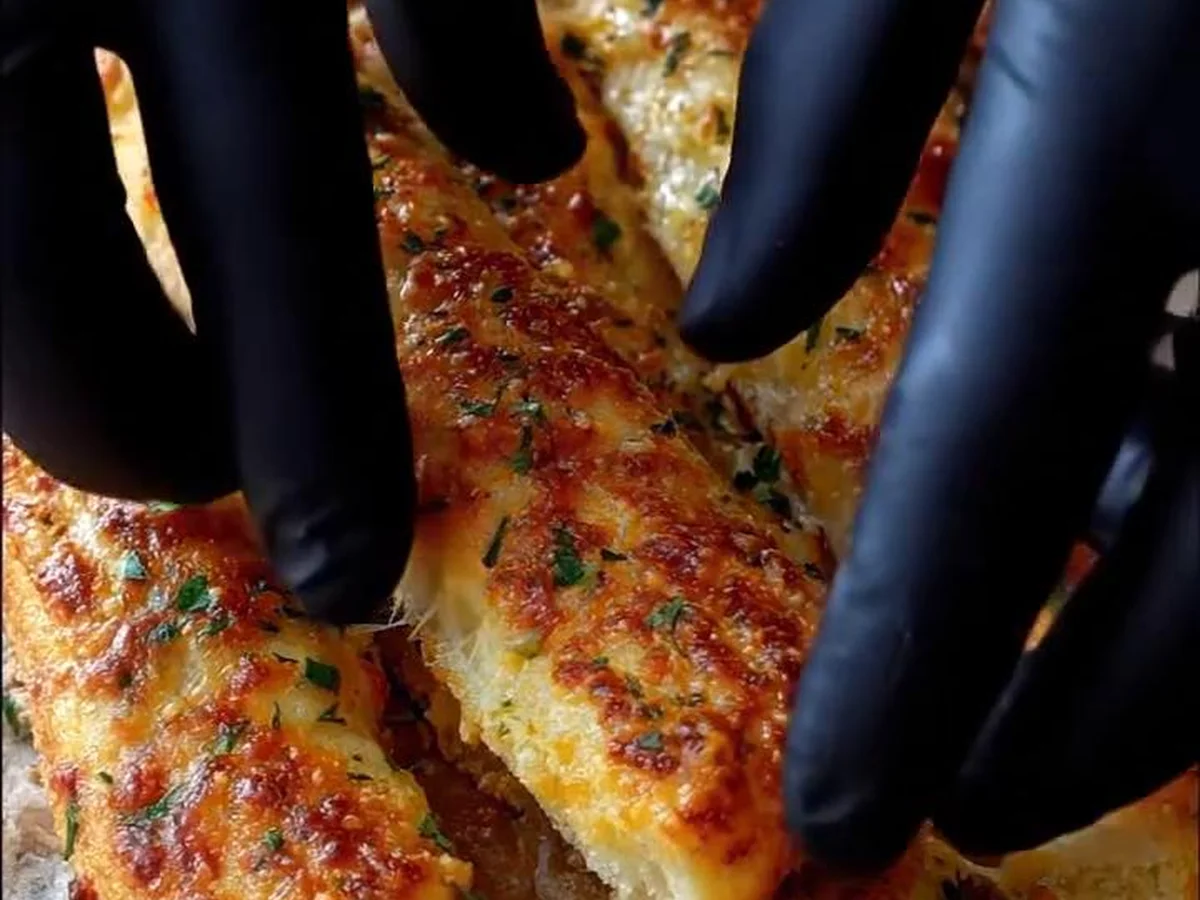
There’s something irresistibly comforting about the aroma of freshly baked cheese breadsticks wafting through your home. Imagine walking into a cozy kitchen, the warm scent of melted cheese merging with the crusty goodness of baked dough, wrapping you in a blanket of culinary nostalgia. Cheese breadsticks are the ultimate snack or side dish, celebrated for their gooey, savory filling encased in a lightly golden crust. They are perfect for all occasions, whether enjoyed at a family gathering, served as an appetizer at a dinner party, or devoured alongside a hearty soup during winter. With their crunchy exterior and delightful cheese pull with every bite, they instantly evoke feelings of warmth and delight, transforming even an ordinary day into a special occasion. You can enjoy them straight out of the oven or with a flavorful dipping sauce, making them incredibly versatile. Once you give this recipe a try, you’ll understand why cheese breadsticks have solidified their place as an enduring comfort food.
The Origins and History
Cheese breadsticks can be closely associated with various culinary traditions across the globe, with roots potentially traceable to the eras when bread-making and cheese production flourished. Though no specific provenance can be attributed to this delightful dish, one could speculate that it arose from the union of simple bread-making techniques and the love for melted cheese—a phenomenon that spans cultures. In Italy, similar staples like grissini (thin, crispy breadsticks) are often paired with cheese for a delectable snack. Turkish cuisine offers its own spin with simit, baked goods adorned with sesame seeds that can be easily paired with cheese. These cross-cultural traditions highlight a universal appreciation for the combination of bread and cheese—a pairing that transcends cultural boundaries, bringing forth delightful variations that have enchanted palates for generations. Indeed, cheese breadsticks mirror the global love for simple, comforting flavors, a testament to humanity’s quest for satisfying, heartfelt sustenance.
Why You Will Absolutely Love This Recipe
- Flavor Profile: The combination of melted cheese, fragrant garlic, and aromatic oregano makes every bite an explosion of flavor.
- Ease of Preparation: With a handful of basic ingredients and straightforward techniques, even novice bakers can achieve bakery-quality results.
- A Crowd-Pleaser: These breadsticks are adored by both kids and adults alike—serve them at gatherings, and watch them disappear quickly!
- Great for Leftovers: If you have any left, these breadsticks make excellent snacks or lunch components, delicious either cold or reheated.
Deep Dive into the Ingredients
Let’s break down the star players of this delightful recipe. The foundation of the cheese breadsticks is all-purpose flour, a versatile ingredient that provides the necessary gluten structure for a satisfying chew. You could substitute it with whole wheat flour for a nuttier flavor or gluten-free flour for a dietary accommodation; however, the texture may differ slightly.
Next, the grated cheese takes the spotlight. You can opt for mozzarella for its exceptional melting quality or cheddar for its bold, sharp flavor. Blending cheeses adds complexity—consider using a mix of both! Experimenting with your favorite cheeses can yield fun flavors, but ensure they have good melting properties to achieve that coveted gooey texture.
This recipe also calls for baking powder, an essential leavening agent that encourages the breadsticks to rise a bit in the oven. This ingredient adds to the lightness of the breadsticks, preventing them from being dense. For a more rustic breadstick, you could experiment with yeast instead, allowing for longer fermentation that can enhance flavor.
Salt is imperative as it enhances all other flavors, creating a harmonious balance in the breadstick. Start with the specified amount and adjust based on the saltiness of your cheese or personal preference. For additional flavor, you can introduce garlic powder and dried oregano. Garlic powder lends its aromatic presence, while oregano introduces a herby note reminiscent of Italian cuisine—both contribute layers of flavor.
Finally, warm water helps in activating the baking powder and hydrating the flour, creating a dough that is both pliable and easy to work with. Ensuring the water is warm allows for better gluten development while preventing any shock to the yeast, should you choose to adapt the recipe with yeast. The balance of these ingredients works in concert to yield breadsticks that are delightfully chewy on the inside yet crisp on the outside.
Pro Tips for Perfect Results
To create the perfect cheese breadsticks, pay attention to a few key technical aspects. First, ensure your water is warm—ideally around 110°F (43°C)—as this temperature aids the baking powder in activations and the dough’s structural integrity. Secondly, when mixing your dough, avoid over-kneading. Kneading should take just a few minutes until the dough comes together and becomes smooth. Overworking it can lead to tough breadsticks.
When it’s time to shape your breadsticks, lightly flour your work surface to prevent sticking, and use a sharp knife or pizza cutter to ensure clean cuts. This will help retain the shape of your breadsticks during baking. If possible, allow the breadsticks to rest for about 10-15 minutes after shaping before baking. This brief resting period helps the dough relax and can contribute to a better rise.
Lastly, watch your breadsticks carefully as they bake. Every oven behaves differently; the golden-brown perfection you seek may only take minutes. Aim for a beautiful golden hue, which indicates that they’re ready to be pulled from the oven. Once out, let them cool slightly—the cheese will be molten inside, providing the perfect cheesy pull that dreams are made of!
Serving and Pairing Suggestions
These cheese breadsticks shine on their own, but they can also be paired with numerous accompaniments to elevate your dining experience. They pair wonderfully with marinara or garlic dipping sauces for a classic combo. Serve them alongside a fresh garden salad or a hearty soup, such as tomato basil or minestrone, to create a fulfilling meal. For beverages, consider a light-bodied wine like Pinot Grigio or a refreshing lemonade for a delightful contrast.
Storage, Freezing, and Reheating
Store your leftover cheese breadsticks in an airtight container at room temperature for up to 2 days. For longer shelf life, wrap them tightly in plastic and freeze them. When ready to enjoy, simply reheat them in the oven at 350°F (175°C) for about 10 minutes, or microwave them for 30-60 seconds. This approach revives their crispiness and gooey cheese texture, ensuring a delicious snack every time!
Frequently Asked Questions (FAQ)
Q: Can I make these cheese breadsticks ahead of time?
A: Absolutely! You can prepare the dough and store it wrapped in plastic in the refrigerator for up to 24 hours before shaping and baking.
Q: Can I use different types of cheese?
A: Yes! Feel free to experiment with various cheeses like Gouda, Gruyère, or even a spicy pepper jack for an added kick!
Q: What’s the best way to ensure they are crispy?
A: To achieve a crispy texture, make sure to preheat your oven thoroughly and consider baking them on a pizza stone or a baking sheet lined with parchment paper to prevent sticking.
Q: Can I make these cheese breadsticks gluten-free?
A: Yes! Substitute all-purpose flour with a gluten-free flour blend and adjust the hydration as needed to achieve the proper dough consistency.
Conclusion
With their effortless preparation and delightful flavor, cheese breadsticks are a must-try for anyone who enjoys the warm embrace of comfort food. They are sure to become a favorite in your household!
The History of This Recipe
Cheese breadsticks originated in Italy, where traditional bread-making techniques were often combined with local cheeses. As families experimented with their recipes, they began incorporating melted cheese and spices into their dough to create a delightful snack.
These cheesy treats gained popularity in pizzerias, where they were offered as a side dish to complement the main meals. Their irresistible aroma and savory flavor quickly won over customers, leading to widespread demand.
As cheese breadsticks spread beyond Italy, they underwent various adaptations, incorporating regional cheeses and toppings. Today, they are a beloved snack enjoyed around the world, often served with marinara sauce for dipping.
Cheese Breadsticks
INGREDIENTS
- 250 g all-purpose flour
- 150 g grated cheese (mozzarella, cheddar, or a cheese blend)
- 1 teaspoon baking powder
- 1/2 teaspoon salt
- 1/4 teaspoon garlic powder (optional)
- 1/4 teaspoon dried oregano (optional)
- 125 ml water (warm)
INSTRUCTIONS
Preheat your oven to 220°C (425°F). Line a baking sheet with parchment paper.
In a mixing bowl, combine the all-purpose flour, baking powder, salt, garlic powder, and dried oregano. Mix well.
Add in the grated cheese and stir until the cheese is evenly distributed throughout the flour mixture.
Slowly pour in the warm water and olive oil into the dry ingredients. Mix with a fork or your hands until a dough forms.
Knead the dough on a floured surface for about 5 minutes until it becomes smooth and elastic.
Roll out the dough into a rectangle, approximately 1/2 inch thick. Use a pizza cutter or knife to cut the dough into strips, about 1 inch wide.
Place the strips on the prepared baking sheet, leaving some space between each stick.
Sprinkle additional grated cheese on top of the strips if desired for extra flavor.
Bake in the preheated oven for 12-15 minutes, or until the breadsticks are golden brown.
Remove from the oven and allow to cool slightly. Optionally, garnish with freshly chopped parsley before serving.
Time & Calories:
Total Time: 30 minutes
Serving Size: Approximately 12 breadsticks
Estimated Calories per Breadstick: 120 calories (varies based on cheese used)
NOTES
Enjoy your delicious homemade Cheese Breadsticks !